Palo Alto Cortex XSOAR
This integration serves as an extension that leverages the SEKOIA.IO Defend (XDR) API, enabling requests from the Cortex XSOAR interface. It facilitates seamless interaction between SEKOIA.IO and Cortex XSOAR, allowing for efficient command execution and alert retrieval.
Prerequisites
- Sekoia.io XDR licence
- Cotex XSOAR licence
- API Key with a role that contains at least the following permissions:
AlertsAssetsCasesView usersDashboardsIoC Collections
Note
To create your API Key, follow this documentation.
Configure
This section of the documentation will guide you through the steps required to configure the SEKOIA.IO DEFEND (XDR) extension.
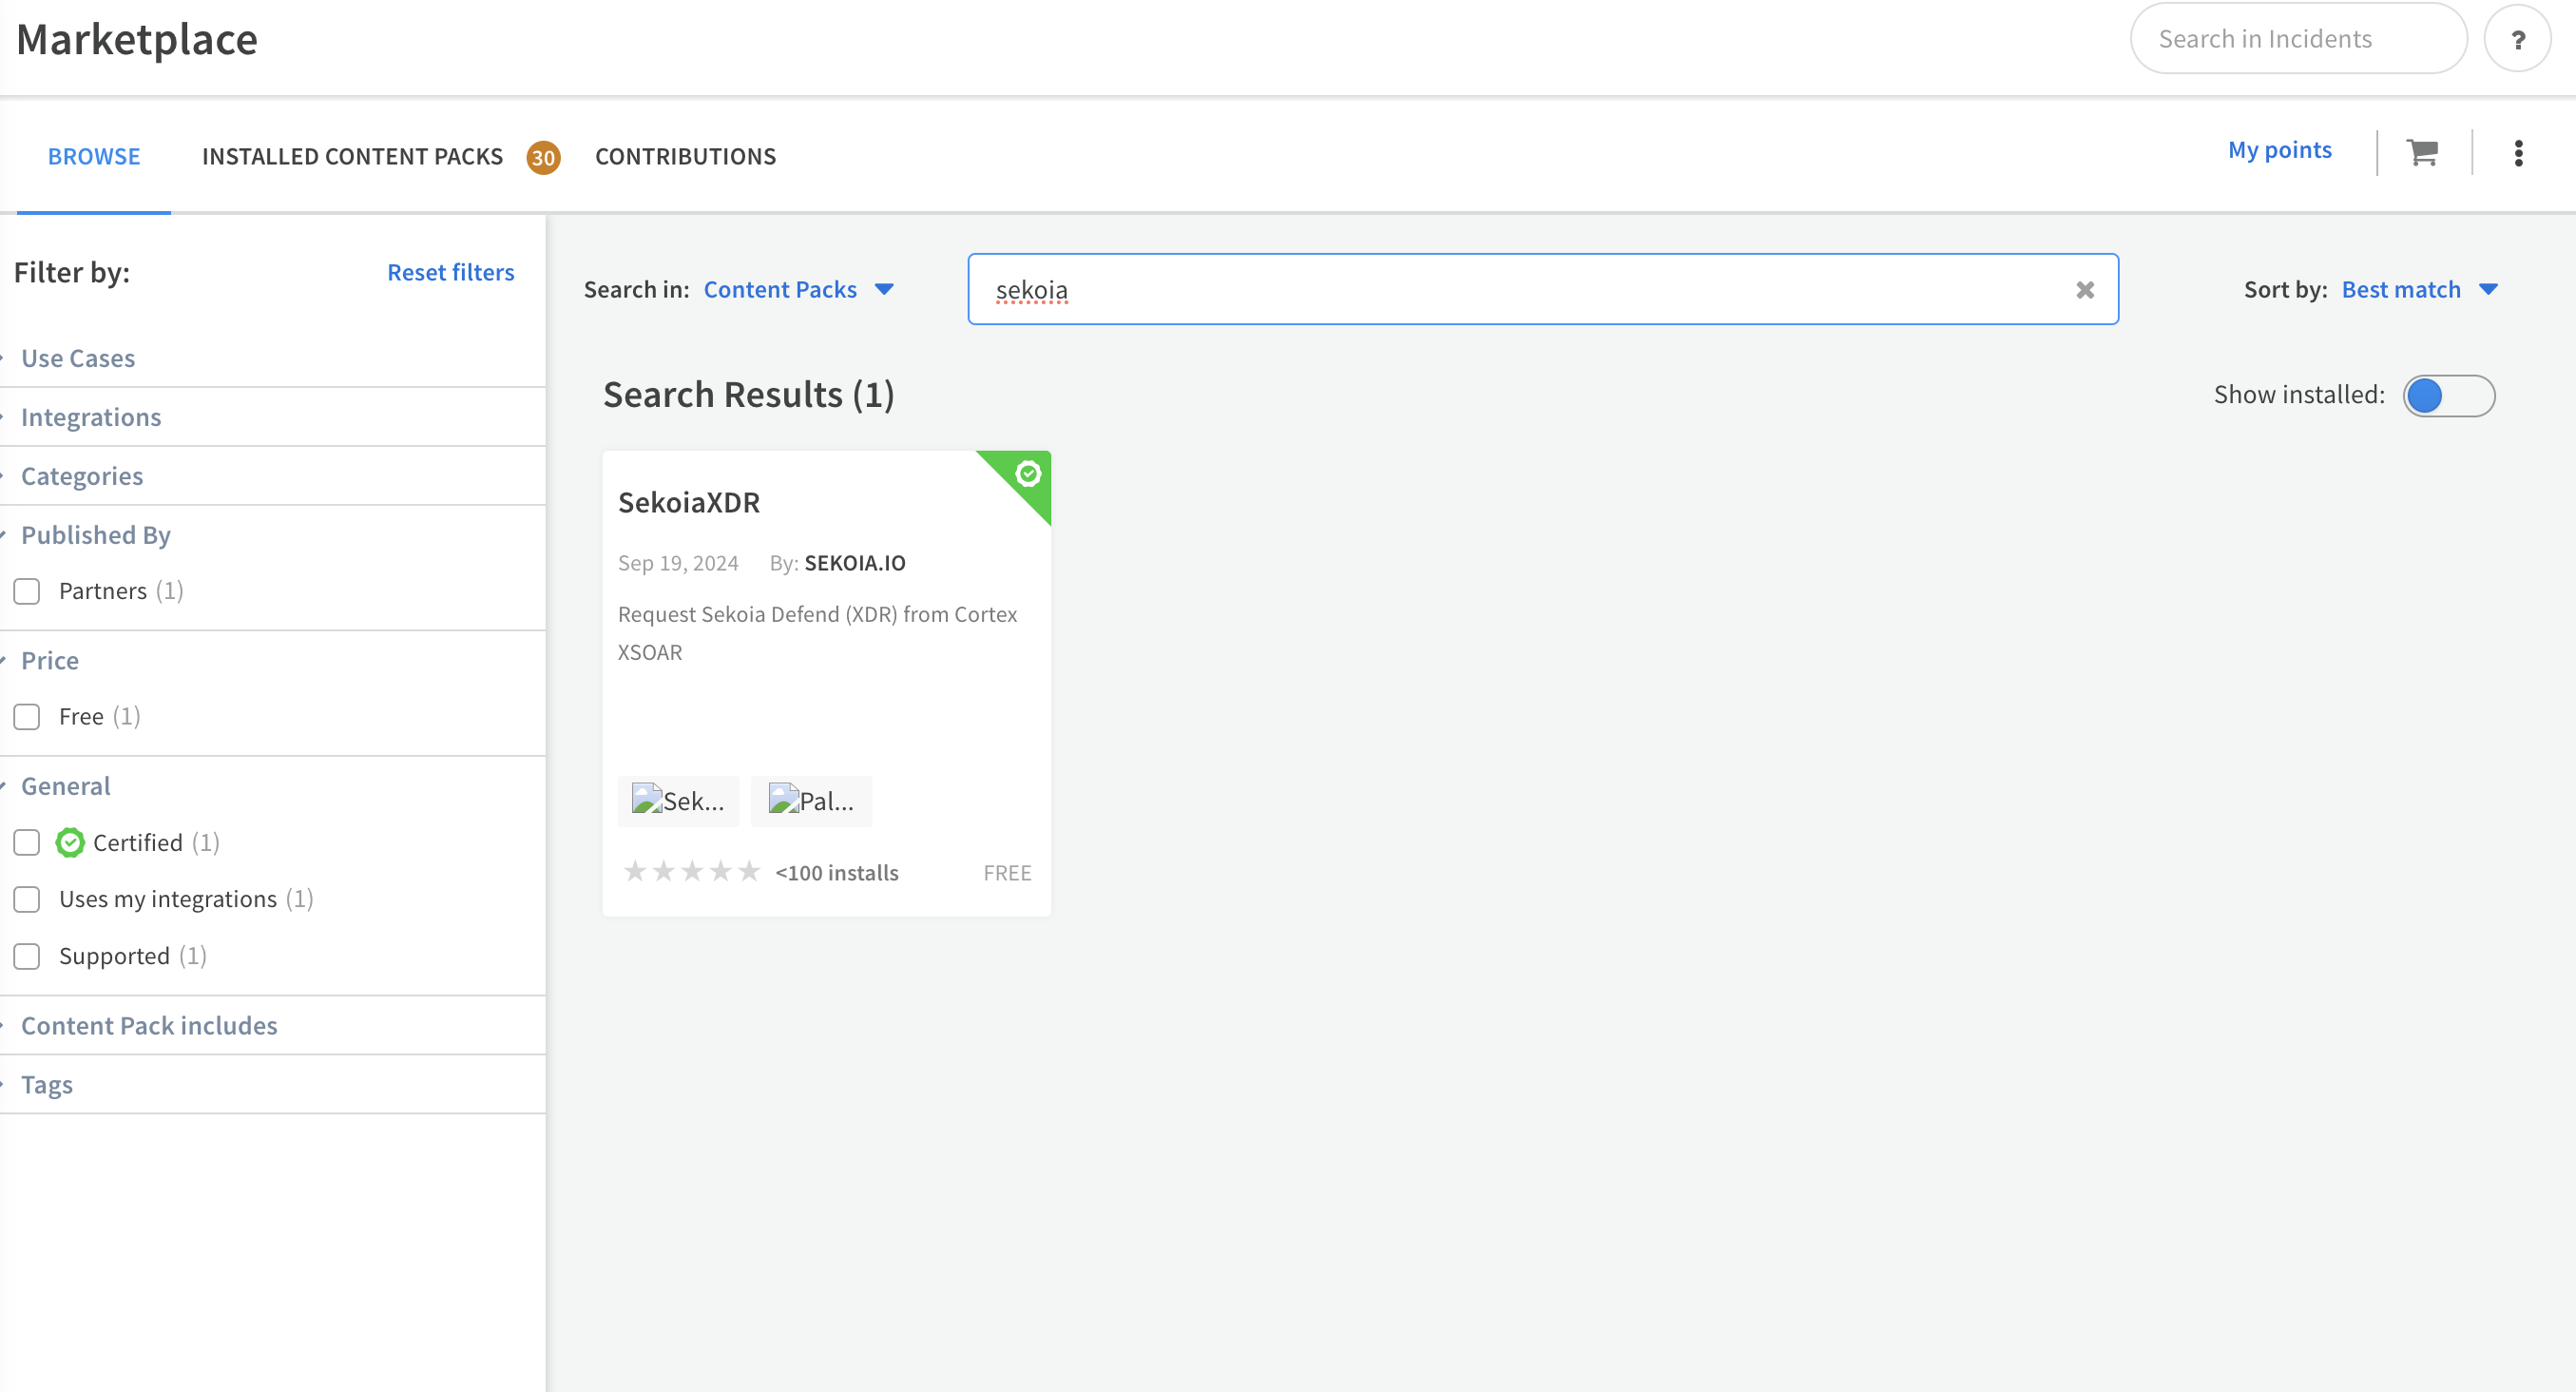
- In your Palo Alto Cortex XSOAR instance, navigate to the Marketplace and search for SekoiaXDR.
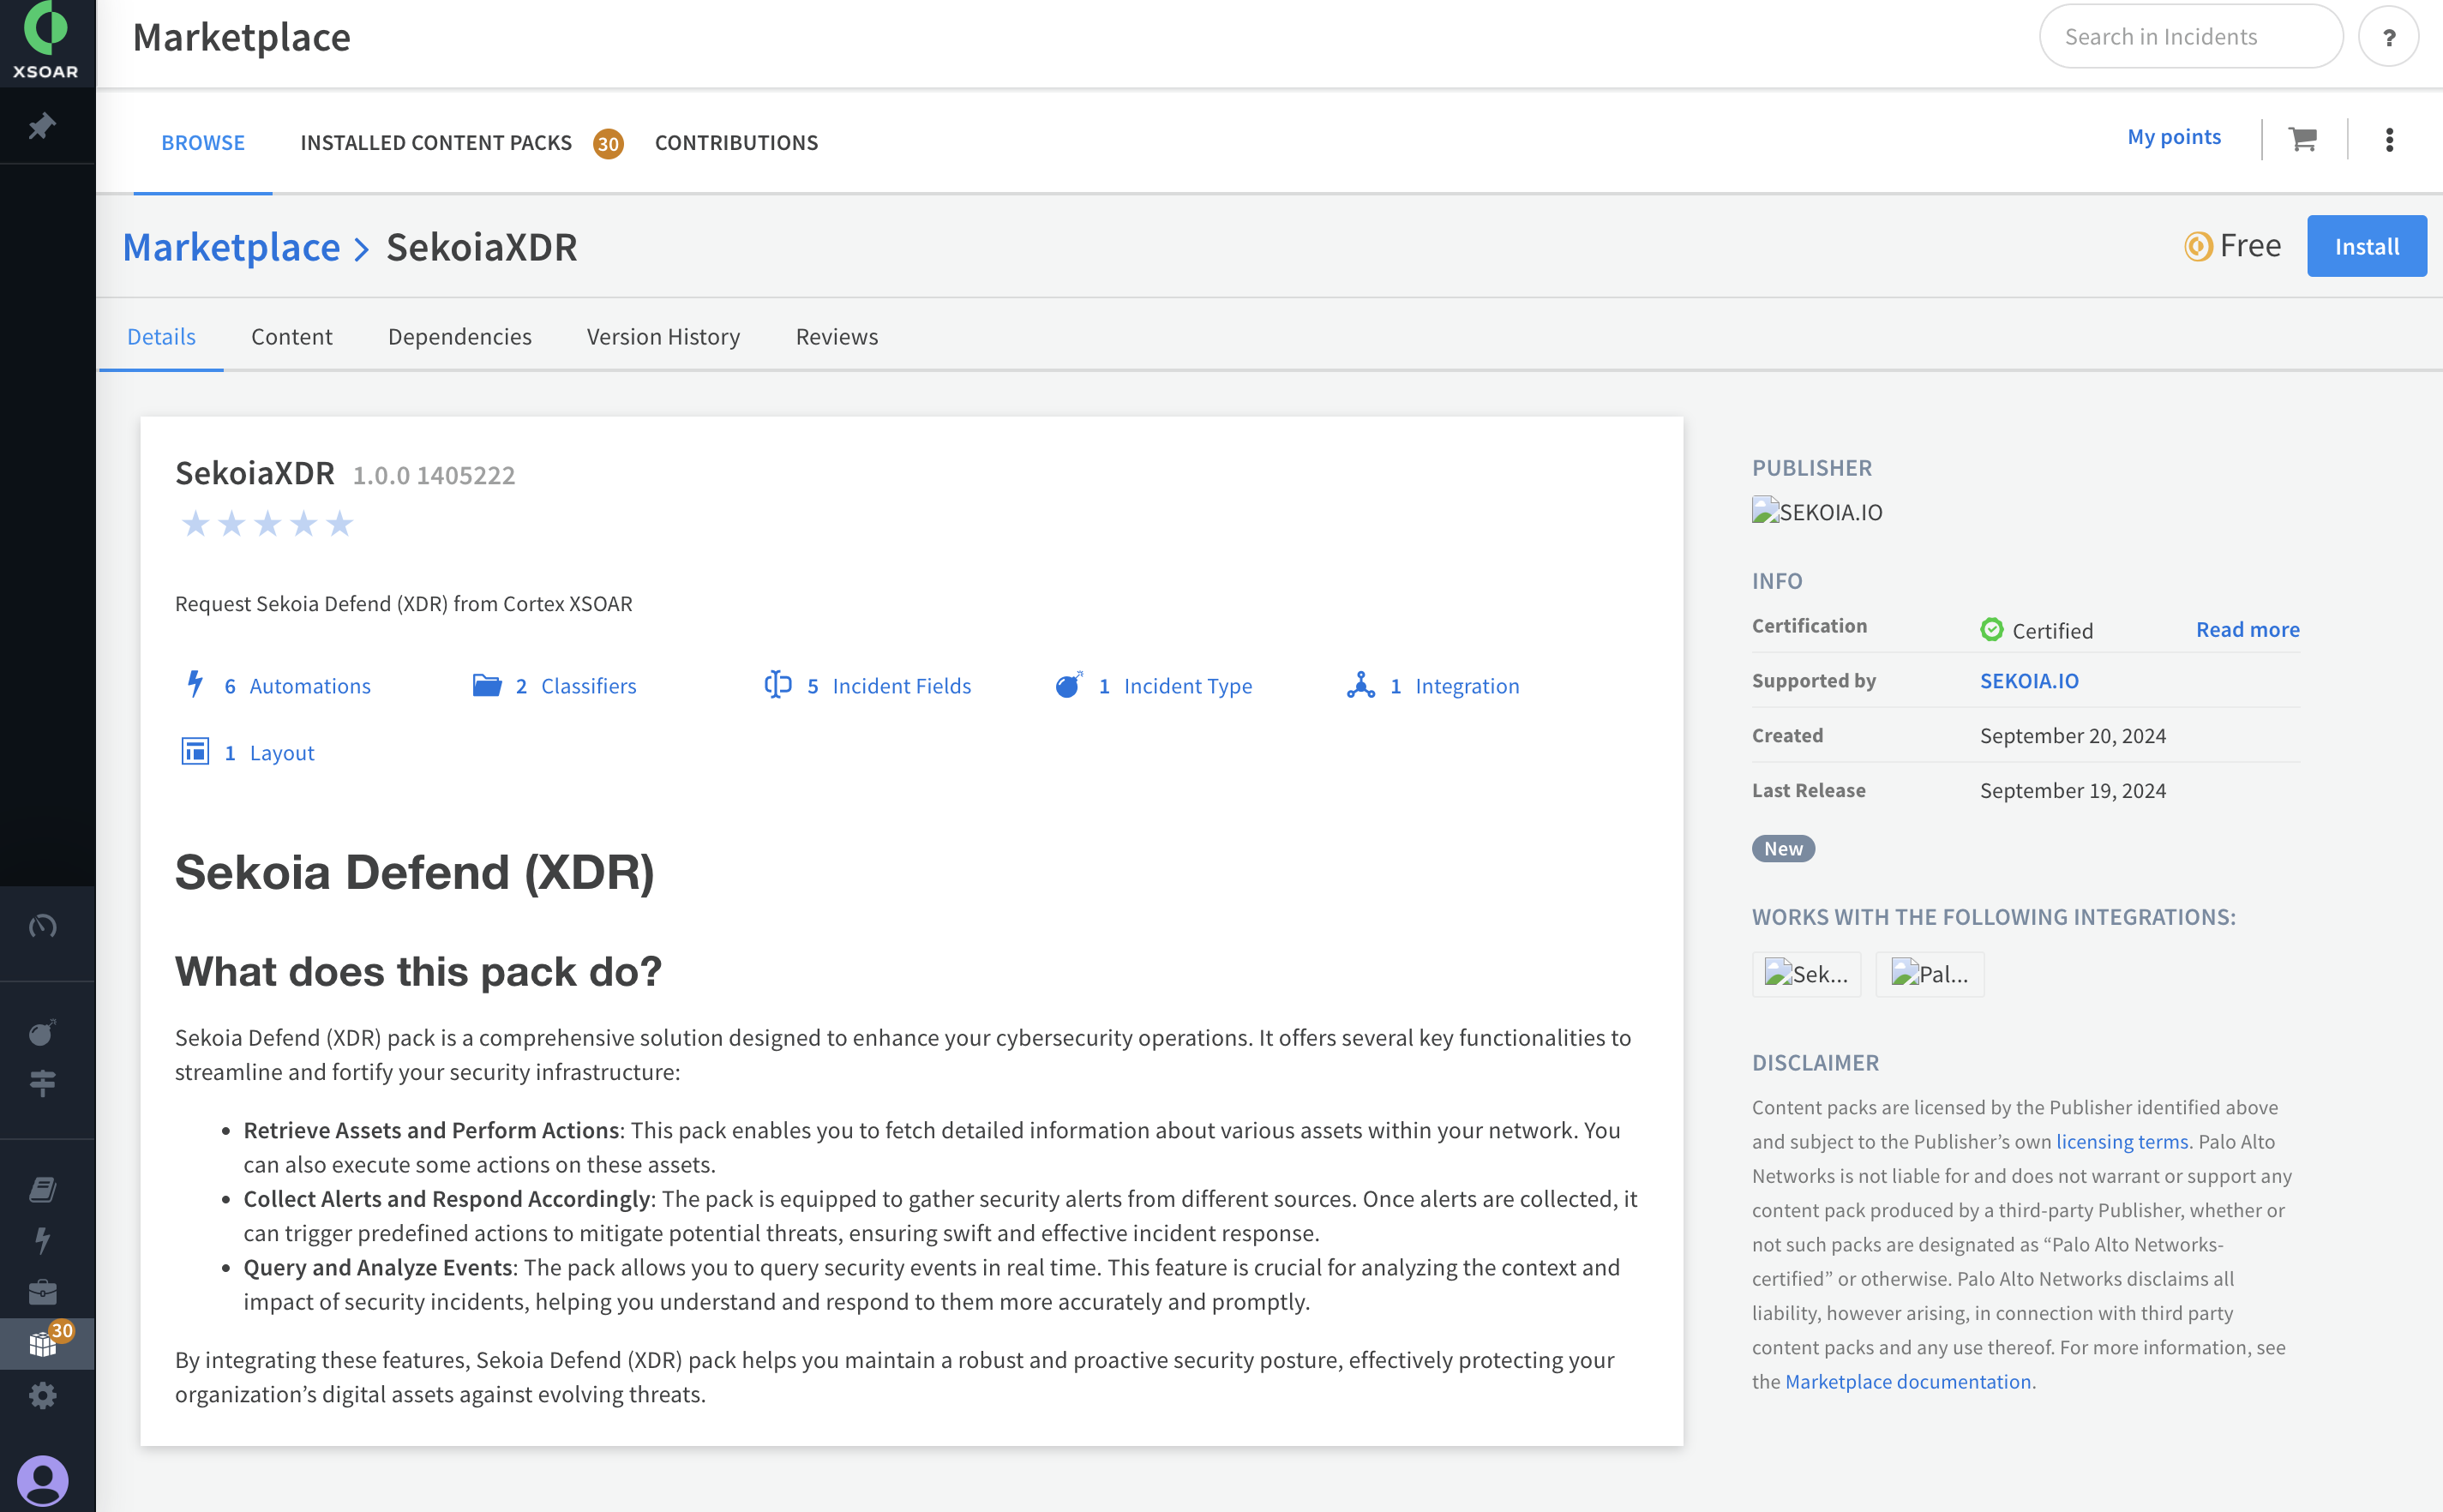
- Select the SEKOIAXDR pack to open its description, then click the Install button to add the pack to your instance.
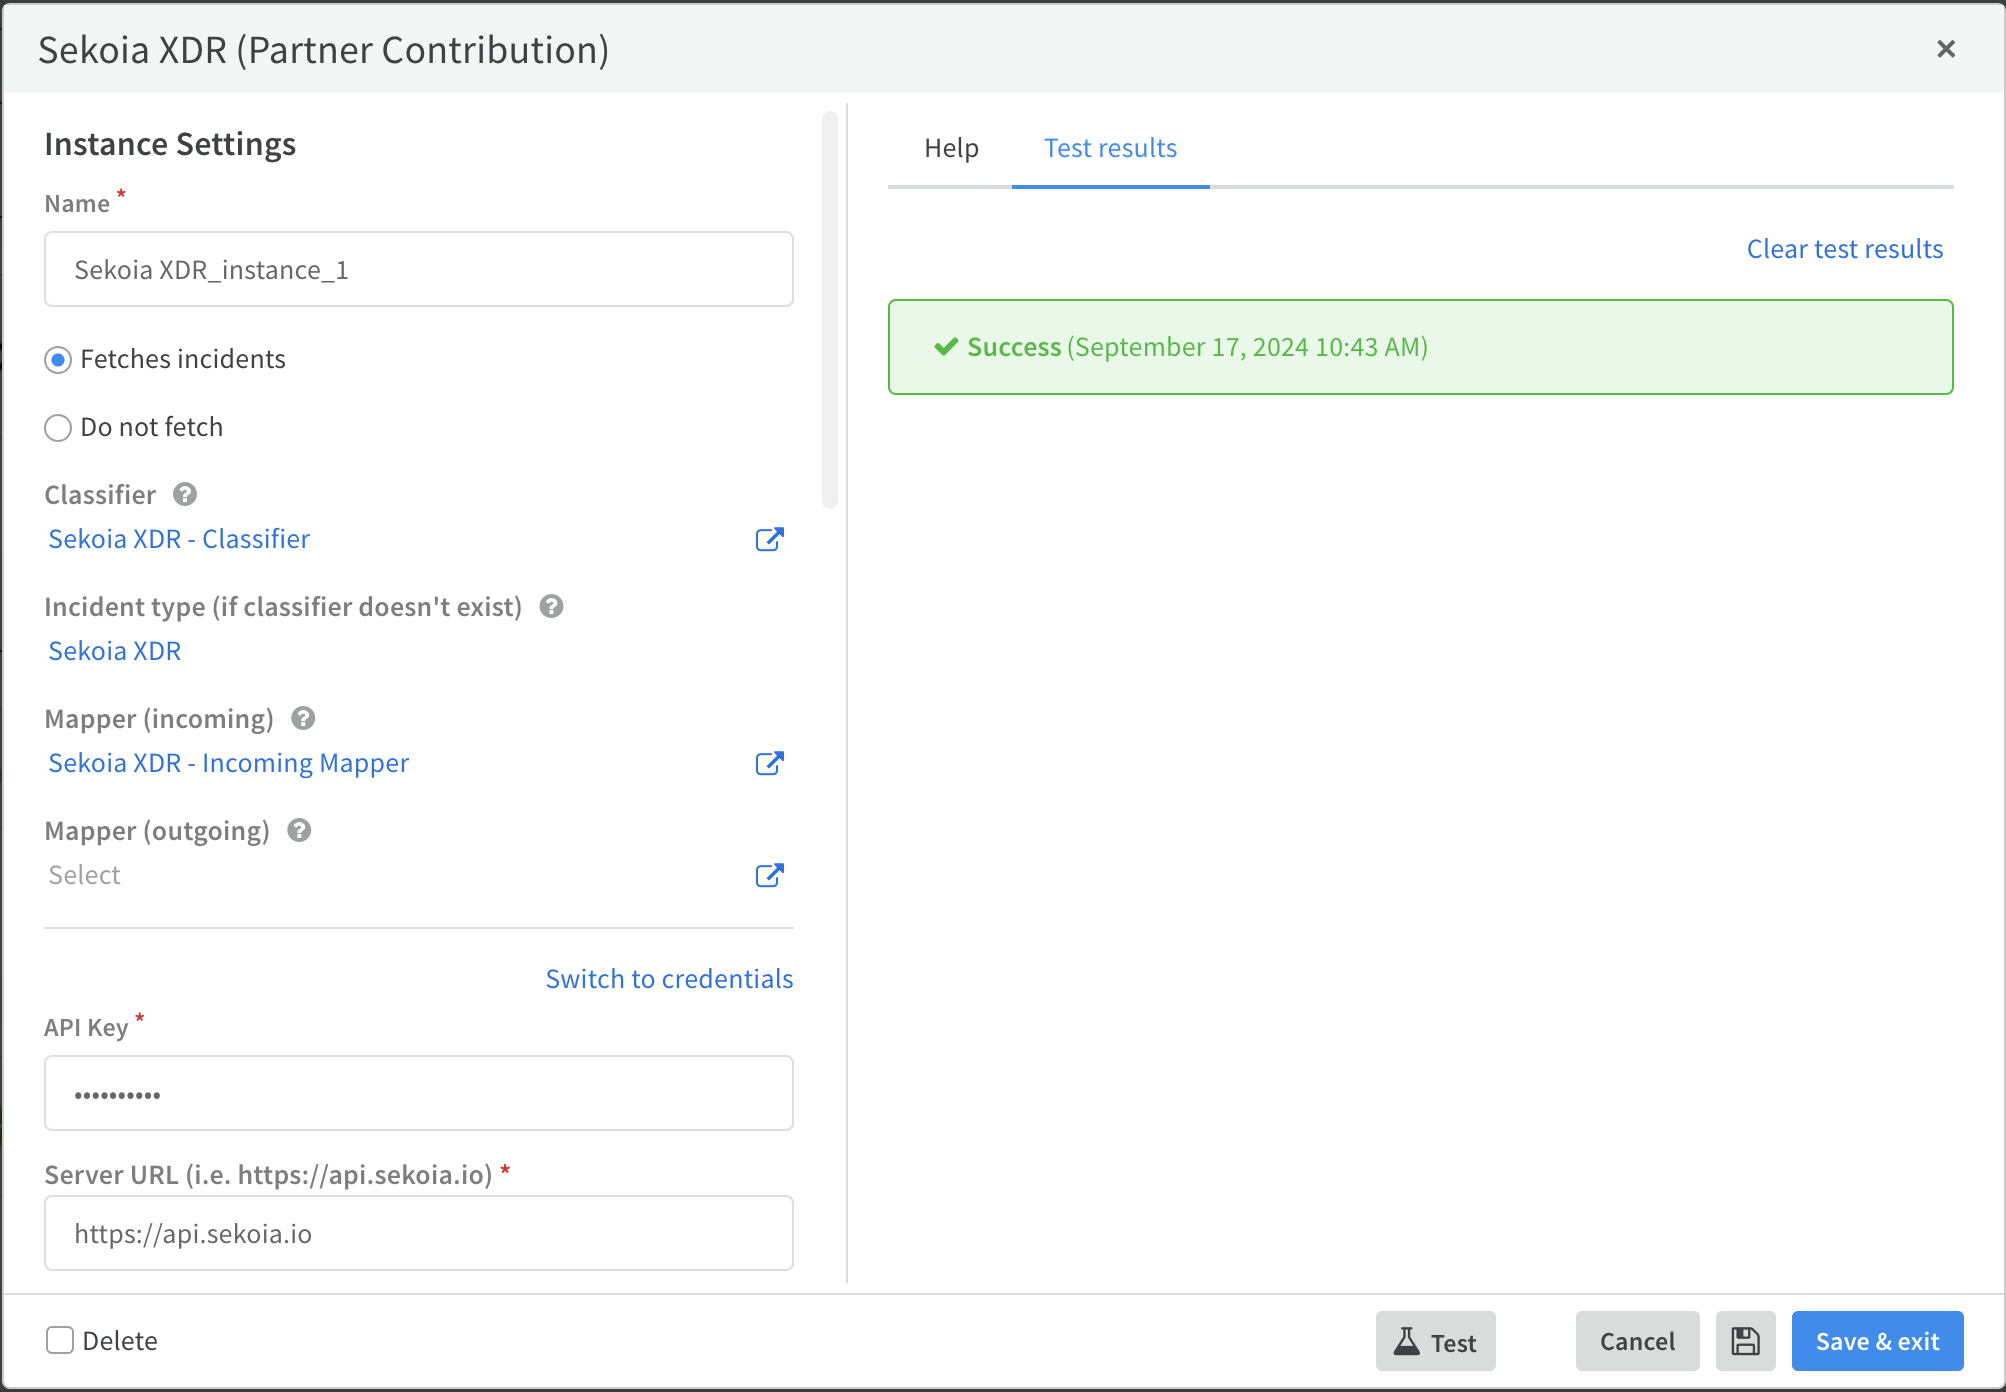
- Once installed, go to Settings. You should see SEKOIAXDR listed. Click the Add instance button to create a new instance.

- Complete the required fields in the configuration form, including the API key, and then save your configuration.

- Use the Test button to validate your configuration (a successful test result should display in green).
You can now utilize the integration. For example, you can run a command like !sekoia-xdr-list-assets limit=5 assets_type="computer".