Graylog
If you are using Graylog as a log collector, you can configure it to push your logs to Sekoia.io. This operation is done by using the “HttpOutput Plugin for Graylog”.
Prerequisites:
- Access to Sekoia.io
- Intake key(s) created
- Priviledge account on the Graylog server
Installation procedure
- Download the JAR file here.
- Copy the JAR file in your Graylog plugin directory.
- Restart
graylog-serverand you are done.
If you want to generate yourself the JAR file :
- Clone this repository “HttpOutput Plugin for Graylog”
- Run
mvn packageto build a JAR file. - Copy generated JAR file in target directory to your Graylog plugin directory.
- Restart
graylog-serverand you are done.
The plugin directory is the
plugins/folder relative from yourgraylog-serverdirectory by default and can be configured in yourgraylog.conffile.
Configuration of the log forwarding
Create a Stream for each Intake
For each of your Intake, you need to create a dedicated Stream.
- Click on
Streams Create Stream- Give a title and a description for your stream, for instance : "Apache logs"
Rule and Pipeline creation
Create a rule
To route your logs to the stream you created, your need to create a Rule and a Pipeline.
- Go to
System/Pipelines - Click on
Manage Rules, thenCreate Rule
Identify the source of logs to be routed to your stream
rule "route traffic to apache stream"
when
    has_field("source") AND
    to_string($message.source) == "<Hostname_Or_IP_Of_Your_Apache_Server>"
then
    route_to_stream("Apache logs");
end
$message.sourcecorresponds to the value of the fieldSourceof your events you want to catch. You can find this value by looking an event you want in theAll messagesStream and look at thesourcefield.
Create a pipeline
Now that you have one or more rules, you need to create a pipeline to apply them to your logs.
- Go to
System/Pipelines - Click on
Manage pipelines>Add new pipelineand give it a name and a description - Click on
Edit connectionsand select your logs input (by defaultAll messages) - Click on
Add new stage- Select
At least one of the rules on this stage matches the message - Select your rule(s)
- Click on
Save
- Select
Your logs should now appear in your dedicated Stream.
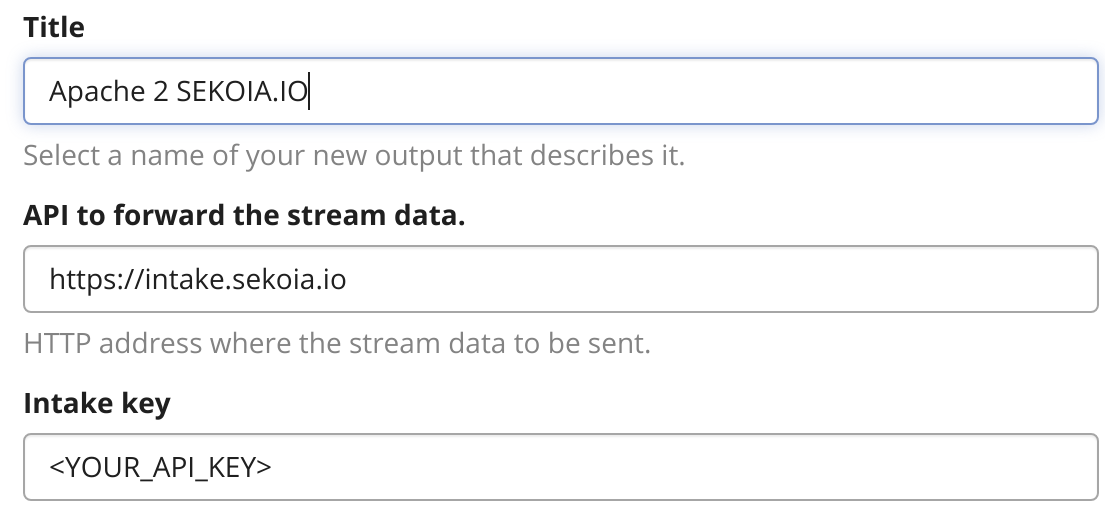
Create a HTTP output for your events.
Now that you have your logs in your stream, you need to configure an Output to send your events to Sekoia.io
- Go to
Streams - Identify your stream and click on
More Actions>Manage Outputs - Declare the output mode associated to the Sekoia.io stream with the type
com.plugin.HttpOutputwith the unique parameterhttps://intake.sekoia.io/batchand your intake key.