Use custom fields in cases
Early Access
This feature is currently in Early Access and is only available for Beta testers. Sekoia.io plans to roll out this functionality to all environments soon.
Custom fields let you attach structured metadata to individual cases. This article explains how to add custom field values to a case and how to update them during an investigation.
Prerequisites
Custom field definitions must exist in your workspace before you can use them on cases. If no fields are available, ask your administrator to create definitions in Settings > Custom fields.
Add a custom field to a case
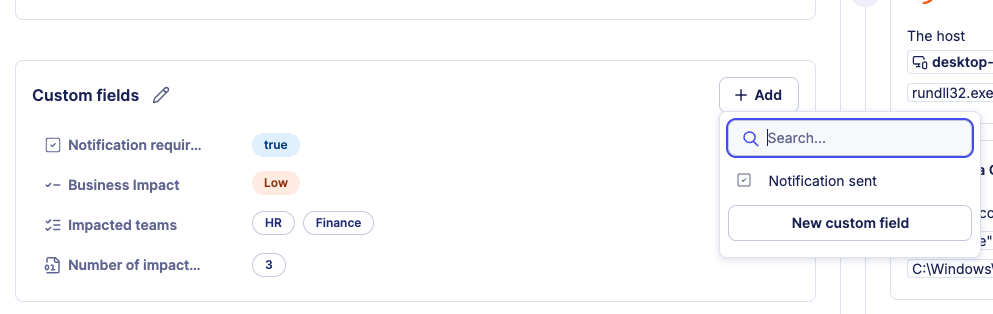
To add a custom field value to a case:
- Open the case details page.
- Locate the Custom fields section.
- Click + Add.
- Select the field from the dropdown.
- Enter or select the appropriate value.
- Click Save.
Auto-added fields
Fields configured with Auto-add to new cases appear automatically on every new case. You only need to fill in their values.
Edit a custom field value
To update an existing custom field value on a case:
- Open the case details page.
- In the Custom fields section, click the field you want to edit.
- Modify the value.
- Click Save.
All changes to custom field values are recorded in the case history, providing a complete audit trail of modifications.
Related articles
- Case custom fields: Overview of custom field types, multi-tenancy behavior, and workspace limits.
- Manage custom field definitions: How to create, edit, and delete custom field definitions in workspace settings.
- Query custom fields: SOL syntax and examples for filtering and aggregating cases by custom field values.
- Case details: Reference for every tab and field available on the case details page.
- Manage cases: How to filter cases by custom field values from the cases listing page.