Manage cases
The cases listing page centralizes all cases across your community. This article explains how to filter and sort cases, perform bulk actions on multiple cases simultaneously, and edit individual cases.
Filter and sort cases
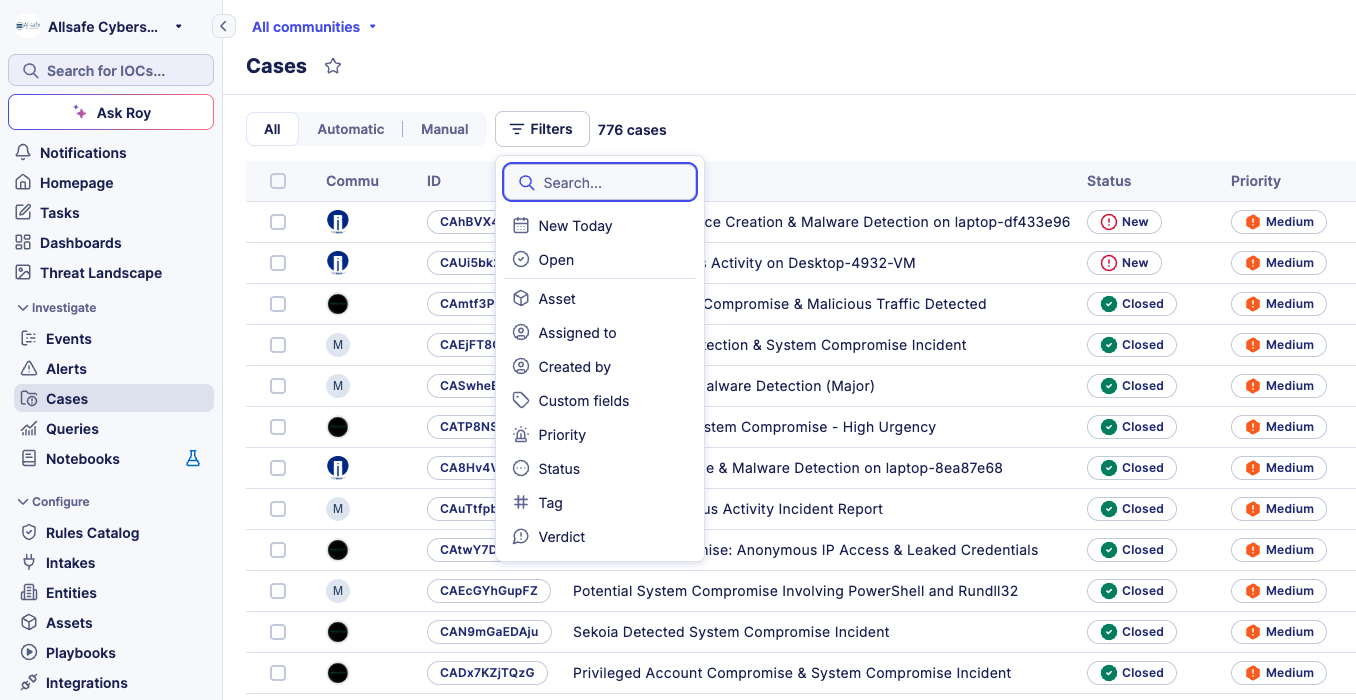
You can filter cases by the following criteria:
| Filter | Description |
|---|---|
| Asset | Shows cases linked to a specific asset. |
| Assignee | Shows cases assigned to a specific analyst. |
| Creator | Shows cases created by a specific user. |
| Custom fields | Filters by any custom field defined in your community. |
| Priority | Filters by priority level (for example, High, Medium, Low). |
| Status | Filters by lifecycle stage (for example, Open, In progress, Closed). |
| Tag | Filters by one or more tags. |
| Verdict | Filters by case outcome (for example, True positive, False positive). |
You can sort the listing by:
- Last edition (default)
- Creation date
- Highest priority
Perform bulk actions on cases
Early Access
This feature is currently in Early Access and is only available for Beta testers. Sekoia.io plans to roll out this functionality to all environments soon.
You can act on multiple cases simultaneously from the listing page. This is useful for triaging large volumes of cases or reassigning incidents at scale.
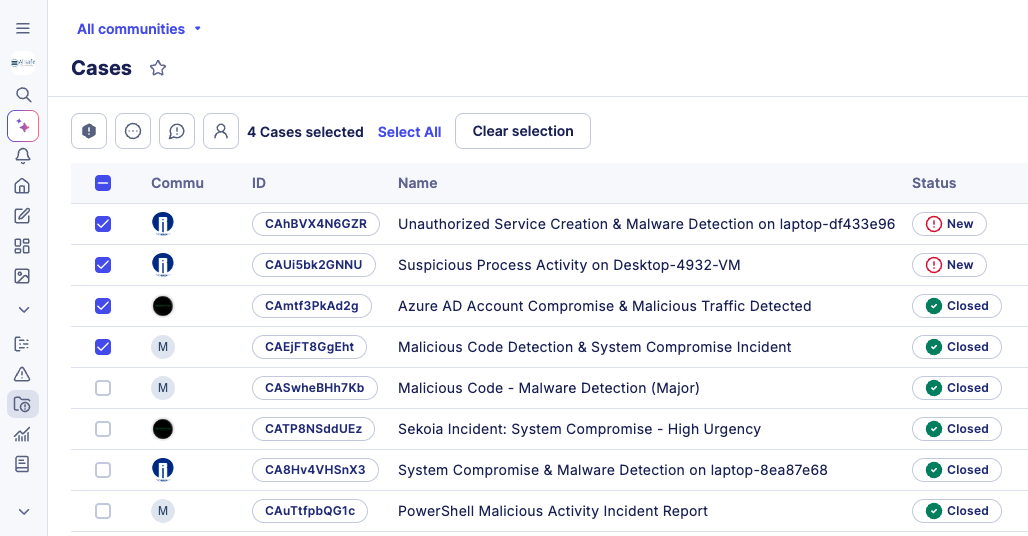
Select multiple cases
Three selection methods are available:
- Individual selection: Click the checkbox on the left side of each case row.
- Page selection: Click the checkbox in the table header to select all cases visible on the current page (up to 25, 50, or 100 cases depending on your page size setting).
- Global selection: After activating page selection, a banner appears at the top of the list. Use it to extend your selection to all cases matching your active filters, up to the platform limit.
Selection limit
Mass selections are capped at 5,000 cases at a time to maintain platform performance. If your filtered results exceed 5,000 cases, a tooltip informs you of this limit. Use the Clear selection button in the action banner to deselect all cases and reset the view.
Available bulk actions
Once you select at least one case, the bulk action toolbar replaces the Filters toolbar at the top of the list. The following actions are available:
| Action | Description |
|---|---|
| Change priority | Updates the priority for all selected cases. |
| Change status | Updates the status for all selected cases. |
| Change verdict | Updates the verdict for all selected cases. |
| Change assignee | Reassigns all selected cases to a specific user. |
Edit a case
Editing restriction
You can only edit cases with a status in the Open or In progress stage. Cases with a Closed status cannot be edited.
To edit a case:
- Click the case to open the details view.
- Click Edit.
- Update the fields you want to change.
- Click Save.
Related articles
- Cases: Overview of what cases are and how they are structured.
- Create a case: Step-by-step instructions to open a new case and attach alerts to it.
- Case details: Reference for every tab and field available on the case details page.
- Case custom fields: How to filter cases by custom field values and manage field definitions.
- Alerts: How alerts are created and how to manage them before grouping them into cases.
- Playbooks: How to automate case workflows and trigger actions based on case updates.
- Dashboards: How to monitor case activity and investigation KPIs across your community.